Add Connections
The ARM enables network operators to configure connections between nodes.
|
1.
|
In the Network Map page, right-click the node from which to configure the connection and from the popup menu, click Add connection. |
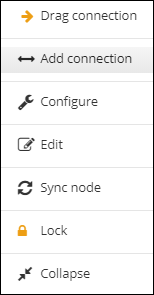
Alternatively, select the Drag connection option, or from the Actions drop-down, select Add connection.
|
2.
|
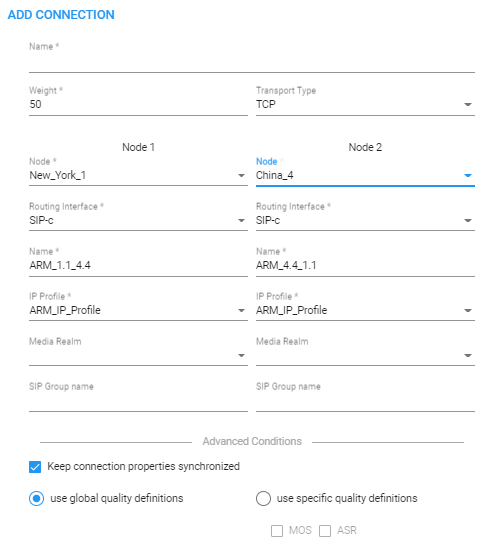
Provide an intuitive name for the connection, to later facilitate user-friendly management in the ARM GUI. |
|
3.
|
Select the weight. Default: 50. Range: 1-100. |
|
4.
|
From the 'Transport Type' drop-down menu, select UDP (default), TCP or TLS. |
|
5.
|
From the 'Node-1' drop-down menu, select the name of the node and from the 'Routing Interface-1' drop-down menu, select its routing interface |
|
6.
|
From the 'Node-2' drop-down menu, select the name of the node and from the 'Routing Interface-2' drop-down menu, select its routing interface |
|
7.
|
Select and configure a corresponding name of an IP Group for each node.
Default ‘Name’ options are taken from the SOURCE and DESTINATION interface IDs, for example, ARM_4.4_1.1, as displayed in the preceding figure. |
|
8.
|
From the ‘IP Profile’ drop-down | ‘Media realm’ drop-down, select an element that is used by or created by the Routing Server in the SBC.
|
|
●
|
If one of the IP Profile names exists in the SBC when adding or editing a connection, the connection will fail to be created.
|
|
●
|
'IP Profile' and 'Media Realm' are available from SBC versions 7.20A.258-0313, 7.20A.260-180 and 7.40A.005.
|
|
10.
|
Click OK; the connection is made. |